Photos On Wood
Verified Post by Michelle Catallo
Published on 05 Jan, 2019
Pecute Cat Roller Toy with Interactive Teaser Mouse, 4 Tier Cat Tower of Track Toy with Catnip and Flash Balls


This is a mix review and DIY craft:
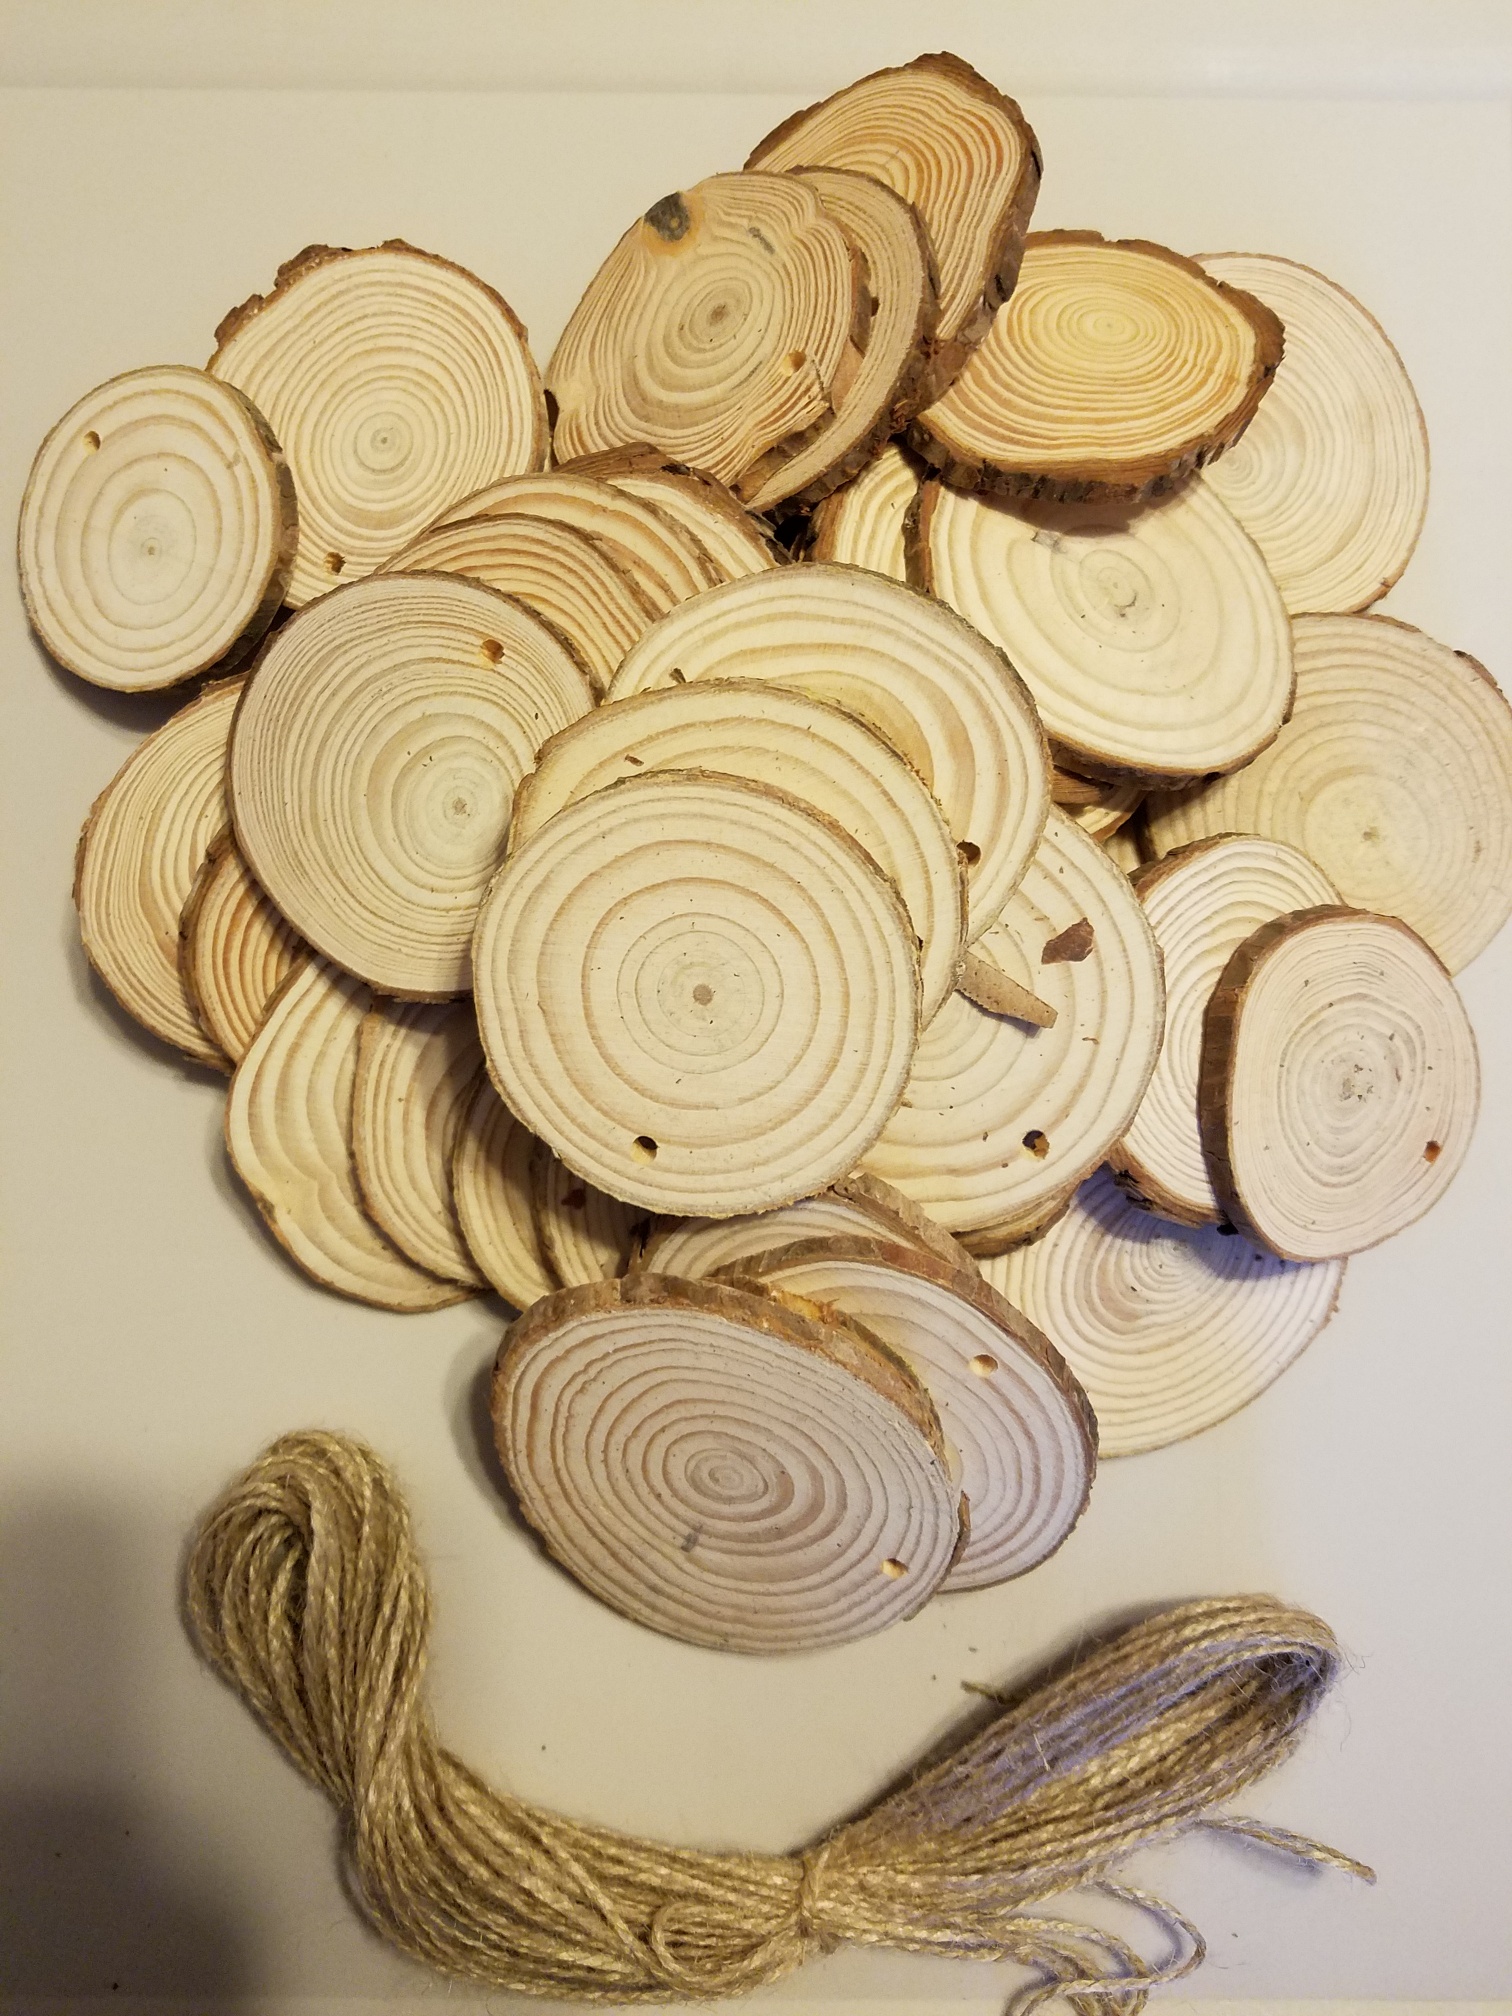
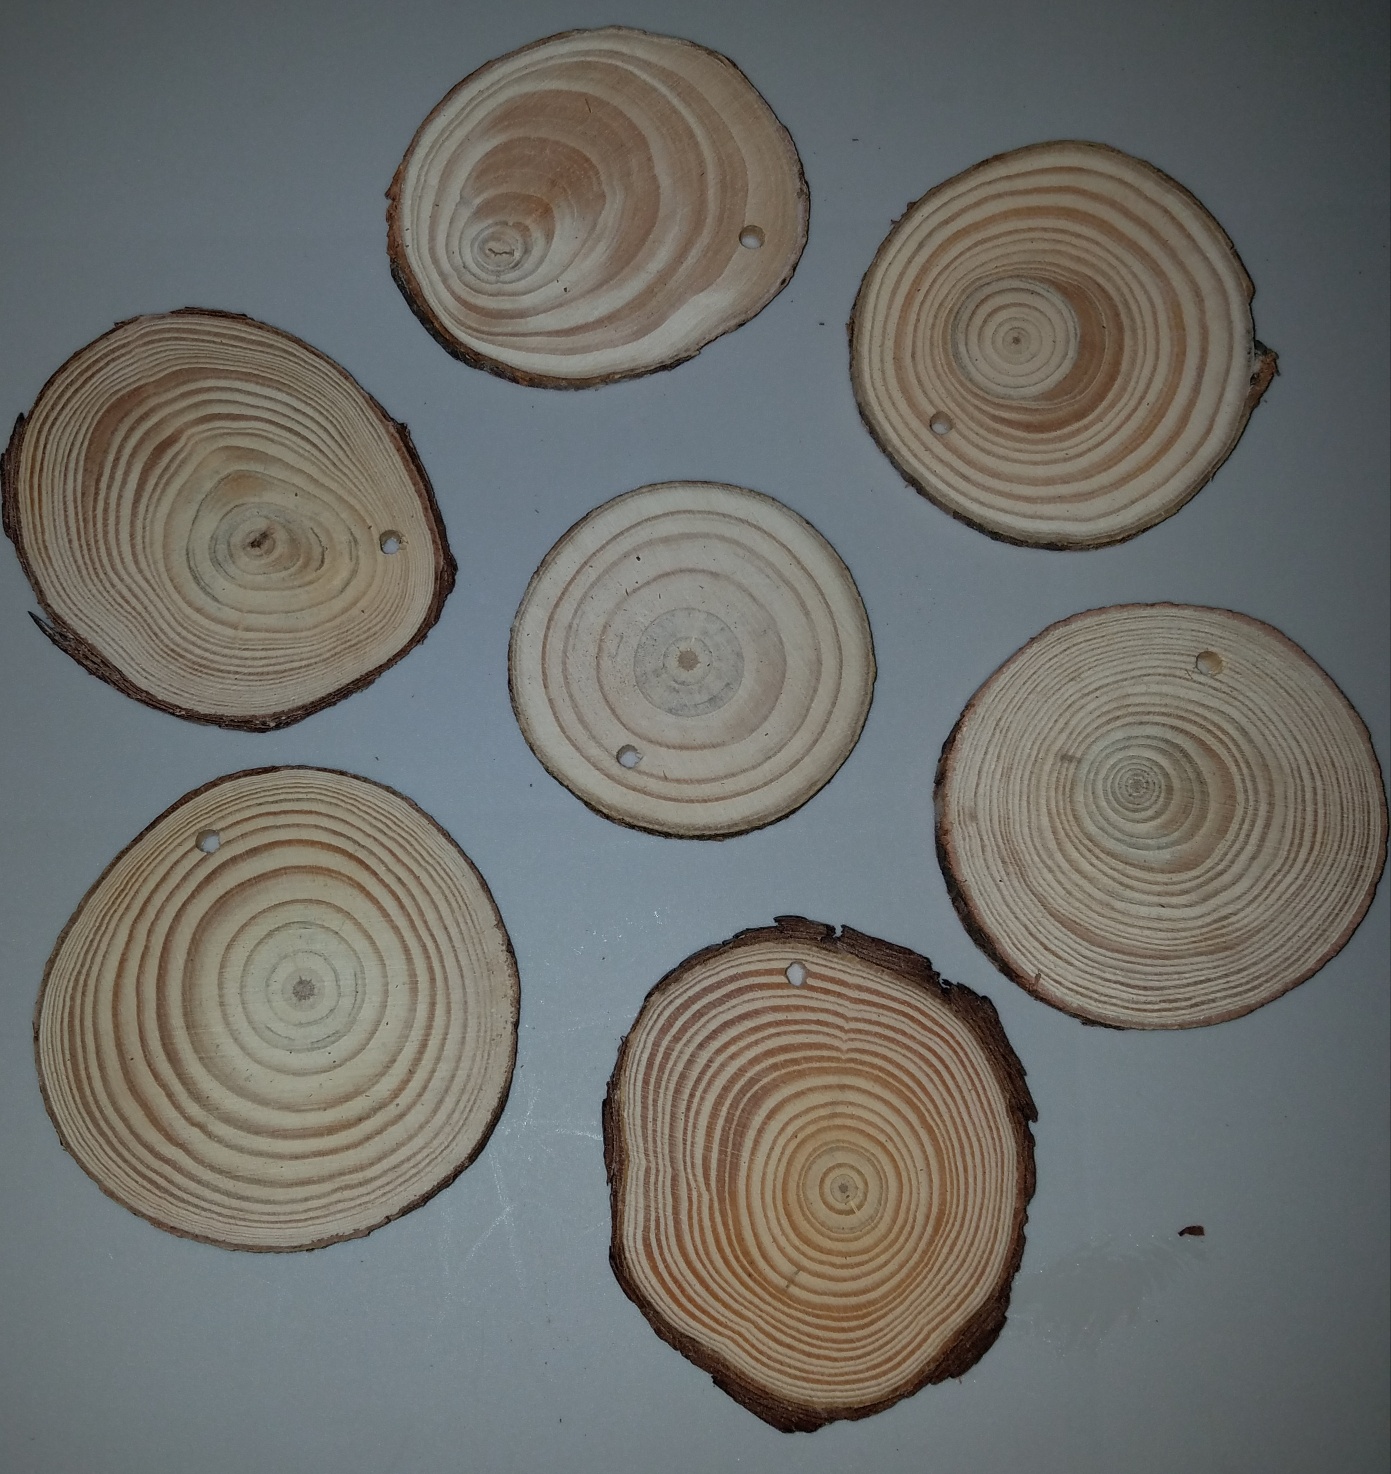
What can one do with 50 pieces of beautifully unfinished natural wood slices?
Transfer photos, something I have wanted to try out for quite a while!
This pack of 50 wooden circles are made from pine and are all between 2.4" and 2.8" in width, plus they come pre-drilled with a total of 40' of natural jute twine as well.
Photo props, Christmas ornaments, holiday decorations, Halloween decorations, wedding decorations, home decorations, and more. You can also use it as a coaster, and it will definitely look unique.
How to transfer photos to wood?
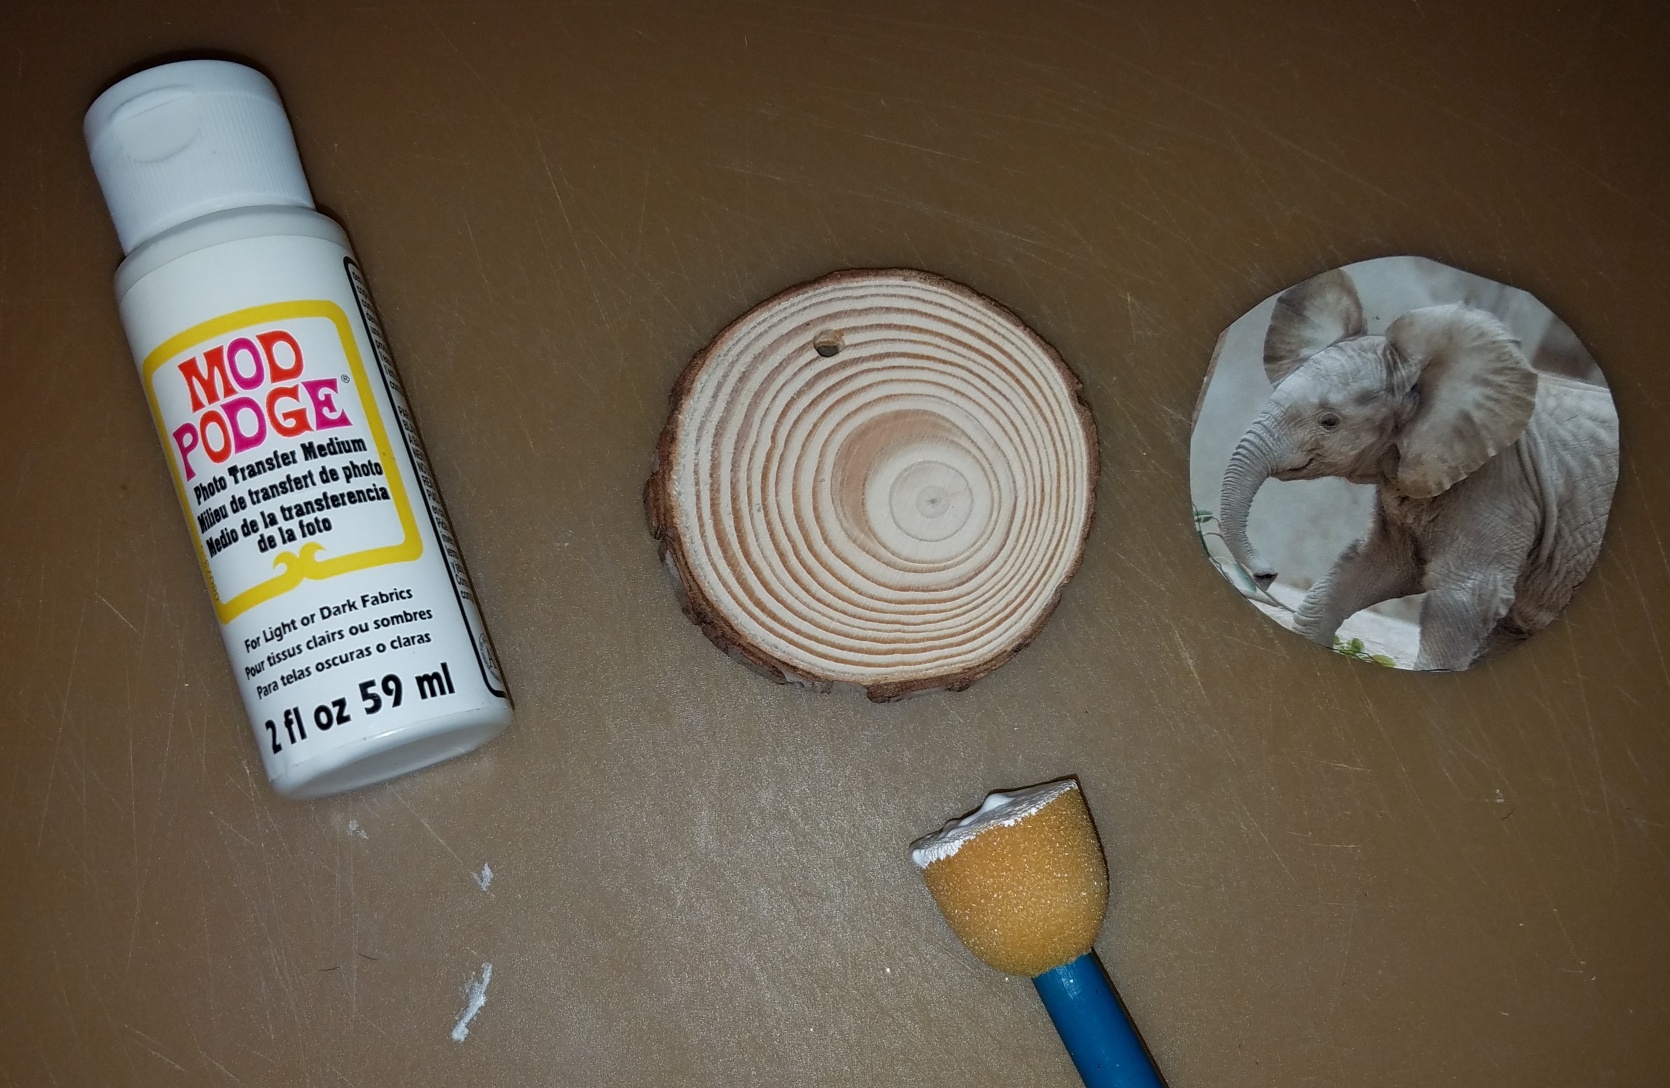
Wood of your choosing Mod Podge Photo Transfer Medium Matte Mod Podge Foam Brush Damp Rag Silicone Craft Mat or Wax paper (useful, but not necessary)Your photo or image MUST be printed on REGULAR paper using a laser printer or photocopier.
So, if you want to transfer a home picture that is already printed on picture paper, make a photocopy of it on regular paper. Or, flip side, just print one out directly to paper. Remember though, laser prints work as well as DRY ink toner prints (like HP ink). You may have to do some research or experiment to see if your printer has dry ink.
I cut out pictures from my kids' ZooNooz magazine of various animals to experiment on.
Step one: Ensure your photo is cut the correct size you want based off of the size of wood you are going to transfer it to.
Step two: Spread the Mod Podge Photo Transfer Medium generously on the photo side of the paper; spread evenly with the foam brush until you cannot see the picture any more.
Step three: Place the paper / Mod Podge side down onto your wood and roll it; clearing out any air pockets. Clean up any excess off the wood if it goops up.
Step four: Let completely dry, up to 24 hours if needed.
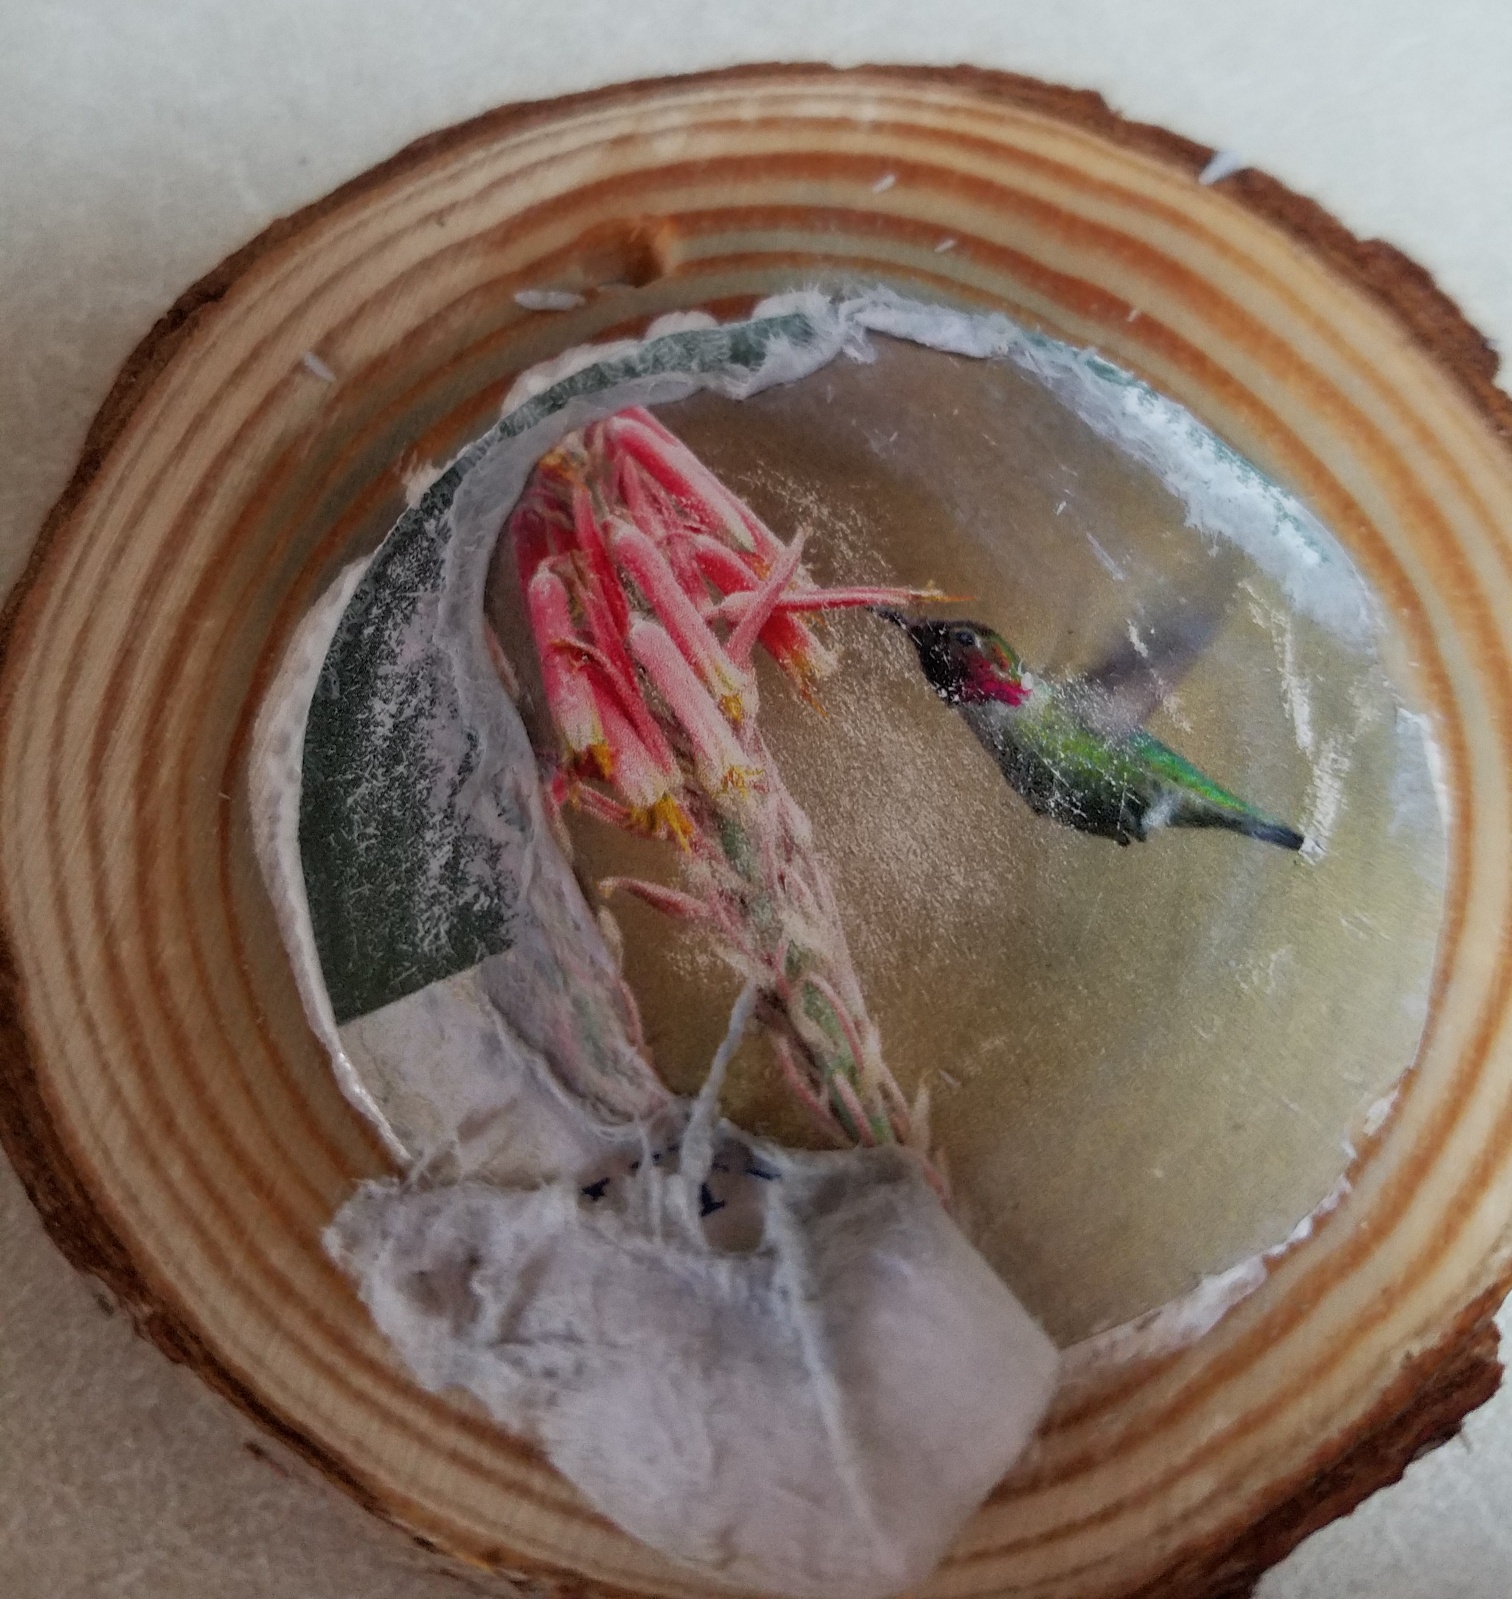
Step five: Once it is dried, use a damp cloth to gently rub away the paper, revealing the picture. Use some strength, could take a bit of elbow grease per se.
Step six: After removing the top layer, I let it dry a little and rub off any excess paper or fluzz that may have collected.
Note: It's better to rub gently and repeat the wetting process than to rub too hard and rub the image away. Yes, this was a lesson's learned!
Step seven: For a vintage look, you can sand the edges of the photo transferred onto the wood.
Step eight: Once you are happy with the transferred photo, seal the it all up with your Matte Mod Podge.
Now you know how to transfer photos to wood! Get started with the right products and have fun!
We are a participant in the Amazon Services LLC Associates Program, an affiliate advertising program designed to provide a means for us to earn fees by linking to Amazon.com and affiliated sites.